
















Almost every angler who actively fishes with soft lures for predators will reach a point where they start imagining how great it would be to design and make their own lures from scratch. But how do you actually go about it?
I had exactly those thoughts myself, and after reading up on the subject and consulting a few friends, I was itching to get started. In this article I want to share my experiences so far, along with a few tips and tricks, to save you some time and head-scratching. Bear in mind, though, that I'm still a beginner in this area — my aim is simply to motivate you to get creative and point you in the right direction.
Materials and Tools
Before you can start making moulds and eventually lures, you need the right materials. Some you'll probably already have at home; others you can pick up at a DIY store, an art supply shop, or online.
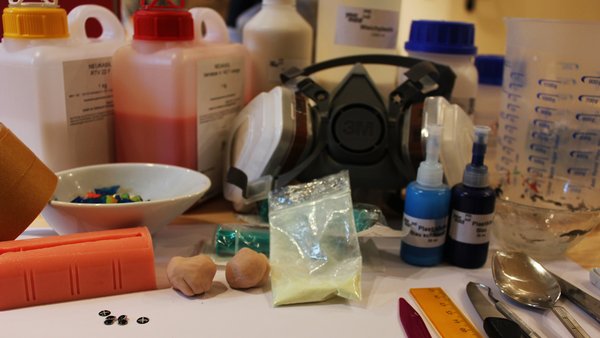
For the method I describe in this article, you'll need the following:
- 2 kg of silicone
- A brush and a small container for mixing the resin
- Plastisol or old soft lures
- Fimo or Super Sculpey (modelling clay for shaping the blank)
- Double-sided tape
- Scissors
- Containers for mixing the silicone, such as measuring jugs
- A container for pouring the mould
- A microwave
- A suitable container for heating the plastisol in the microwave
- A respirator mask (important!)
Tip:
Start by buying modest quantities to get a feel for the process. Always compare prices so you don't end up regretting your choices later!
Making the Blank
Now that you've got the slightly tedious — and admittedly costly — part out of the way, you can finally get stuck in with the fun stuff.
First, you need a lure design you want to replicate. Take some time to think it through and sketch out your ideas.
Sculpt or Carve Your Model?
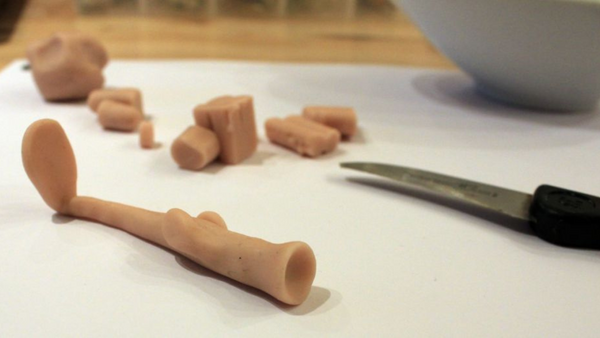
In this article I'm shaping my blank from Super Sculpey (many thanks for the recommendation, Krisztián) — a modelling clay that holds its shape well without being too soft.
There are other ways to create your blank, of course. You can carve it from balsa wood or rigid PU foam, for example. If you do go down the carving route, though, please watch your fingers — it takes considerably more dexterity.
Deciding on Shape and Size
You first need to decide how large and bulky you want the lure to be, and what shape it should take — it helps to sketch it on paper beforehand. Based on that, you choose your amount of clay and start forming it.
Fins, for instance, can be shaped separately and then pressed onto the body, blending them in gently with your finger. Cocktail sticks, a knife, or other tools come in handy here — a knife lets you carve in gill slits, while the end of a lolly stick is perfect for pressing eyes into the clay. Shaping the blank really isn't difficult in my experience, and with a bit of practice it's genuinely enjoyable.
You can let your imagination run wild, though very fine details are naturally harder to pull off.
Making the Mould for Your Soft Lure
Once your blank is finished, you need to create a mould to pour the plastisol into. A plastic container from the kitchen works well — just make sure the base is as flat as possible and the volume is kept to a minimum, so you don't waste more material than necessary.
Securing the Blank
Take a strip of double-sided tape and stick it to the base of the container.
Now press the blank onto the tape, back side down. It's very important that there are no air pockets between the blank and the tape. When pressing it down, take care not to distort its shape.
Pouring the Silicone Mould
So far, so good. Now it's time to bring in the silicone.
You can use plaster of Paris instead of silicone — it's considerably cheaper, but working with it is trickier, especially for beginners.
With the silicone I use, you mix both parts in a 1:1 ratio. Mix them thoroughly until you have a uniform, creamy consistency, taking care not to introduce any bubbles.
That's easier said than done, but don't worry — gently swirling the container should get rid of most of them. Once everything is well combined and the bubbles are out, slowly pour the silicone into the container, starting at the edge.
- Mix both components thoroughly
- Stick the blank down carefully
- Pour the silicone slowly into the container at one point
Now it's simply a case of waiting for the silicone to cure fully — roughly two hours.
Removing the Finished Mould
To release the mould from the container, flex the sides of the plastic outwards. You can also work around the edges with your fingers or a knife. Go gently, though — you don't want to damage the mould.
Once the mould is free, you can trim any excess silicone you find troublesome with a sharp razor blade or a craft knife.
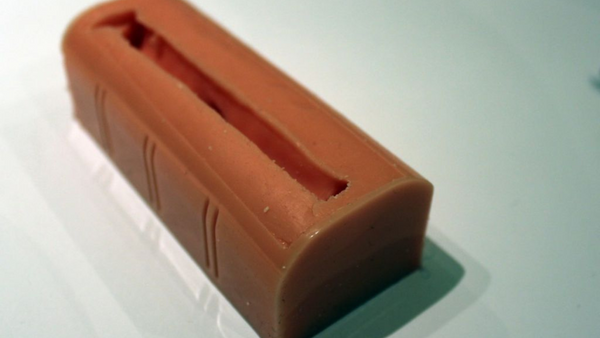
Your mould is ready — now you can finally start pouring!
Pouring Your Own Soft Lure
For this final step, ceramic jugs with a pouring spout work best. Make sure you're wearing a respirator mask, and be careful not to burn your fingers on the molten rubber.
Material: Old Lures or Plastisol
Either use offcuts from old soft lures or fill your ceramic jug with plastisol and heat it in the microwave on a medium setting for approximately three minutes.
Keep checking the consistency: as soon as the rubber is completely liquid, you can take it out. Pure plastisol also changes colour from milky white to clear as it melts.
Choosing Your Colour
If you want to make coloured soft lures, now is the time to mix in your chosen pigments and glitter.
For a glow-in-the-dark effect, you can also add a little phosphate. There really are no limits to what you can do here. Stir in the components you want and heat the mixture briefly once more.
Filling the Mould
Now slowly pour the liquid rubber into your mould. If it spills over the edges slightly, that's absolutely fine — you can trim it away cleanly with a sharp razor blade at the end.

If you want to make multi-coloured lures, you'll need to heat two, three or more ceramic jugs with your chosen colours and pour them into the mould one after another.
Cooling Down and Removing the Lure
Once the mould is filled with the hot rubber, leave it to cool for around ten minutes before carefully peeling the finished lure out.
Final Touches for Your Homemade Soft Lure
Now you can add final details — give it trigger points with luminous paint, soak it in fish oil for a realistic scent, or, as in this example, glue on some eyes.
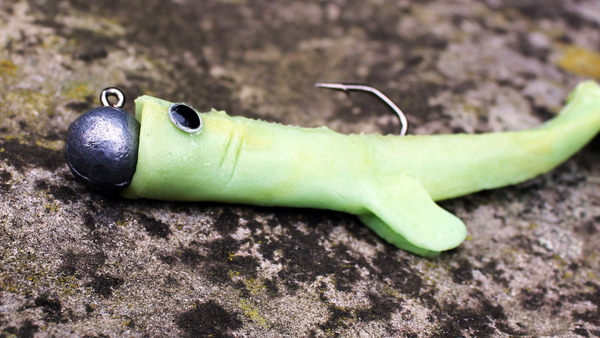
The next time a lure with 3D eyes gets so badly chewed up that it's beyond use, you might have a double recycling option: melt down the rubber and stick the eyes onto a shad you've cast yourself.
Any leftover rubber can be reheated as many times as you like, so nothing needs to go to waste.
Summary
A few parting words before you get started:
It takes a bit of patience and practice, but your moulds and finished lures will get better over time. As you can see, mine are far from 'professional' yet — but it's great fun all the same.
The start-up costs can be quite high, since you need to build up a stock of materials. Your first attempts rarely go to plan and you might find yourself doubting whether it's worth it. Even so, I think it makes a fantastic hobby, especially on cold days and during closed seasons.
We'll be heading out soon to test our homemade lures on the water and see how they perform. We'll make sure to share the results with you!
I hope this article has given you a useful introduction to the topic, and that some of you will enjoy giving it a go.
All the best and good luck — Julian.
Not feeling the DIY route? We've also got plenty of soft lures in the shop!

